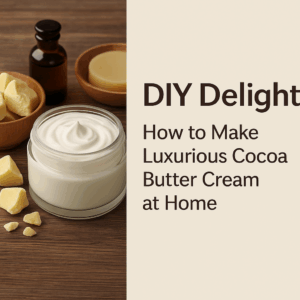
DIY Delight: How to Make Luxurious Cocoa Butter and Shea Butter Cream at Home
Imagine stepping into a world where self-care meets creativity—where you can craft your very own luxurious cocoa butter cream right in the comfort of your kitchen. For an even more nourishing experience, you can compare the effects of shea butter vs cocoa butter and choose the blend that best suits your skincare needs. This DIY delight not only elevates your skincare routine but also wraps your senses in the rich, soothing aroma of cocoa butter.
Creating this velvety cream is surprisingly simple and offers a rewarding sense of accomplishment. Whether you’re pampering yourself or looking for a heartfelt gift, homemade cocoa butter cream is a perfect choice that nurtures your skin while keeping your budget in check. Let’s explore the differences between shea butter vs cocoa butter and unlock the secrets to radiant skin through this indulgent, natural recipe.
Benefits of Using Cocoa Butter in Skincare
Cocoa butter, derived from the cocoa bean, is a powerhouse ingredient in the realm of skincare. Its use dates back centuries, celebrated for its rich, emollient properties that have proven effective in treating and soothing dry skin. One of the primary benefits of cocoa butter is its high fatty acid content, which provides deep hydration and helps lock in moisture.
When comparing shea butter vs cocoa butter, one clear difference is texture: cocoa butter is firmer and denser, while shea butter is creamier and absorbs faster. Cocoa butter’s antioxidant properties—including vitamins E and K—help repair the skin and protect it from environmental damage. This makes it ideal for reducing scars, improving elasticity, and soothing sensitive or irritated skin.
Another important point in the shea butter vs cocoa butter discussion is hypoallergenicity. Cocoa butter is unlikely to cause allergic reactions and is well-suited for all skin types. Its natural chocolate aroma enhances the sensory experience, while shea butter offers a more neutral scent and a faster-melting finish. Both are valuable in DIY beauty, but understanding shea butter vs cocoa butter will help you choose based on your skin’s needs.
Essential Ingredients for Cocoa Butter Cream
To create a luxurious cocoa butter cream, start with high-quality, unrefined cocoa butter, which retains more nutrients and provides a richer texture. For added benefits, consider combining it with shea butter—a great way to experience firsthand the difference between shea butter vs cocoa butter.
You’ll also need a carrier oil, such as coconut, jojoba, sweet almond, or olive oil. Each offers unique benefits: for instance, coconut oil has antibacterial properties, while jojoba mimics your skin’s natural oils. Beeswax is used to stabilize the cream and give it structure, though you can use vegan alternatives like candelilla or carnauba wax.
To enrich your cream even further, add a few drops of essential oils. Lavender, chamomile, and rose are soothing, while citrus oils give a fresh, uplifting aroma. When you explore shea butter vs cocoa butter, you can even split your recipe to test both versions and discover which one your skin loves most.
Step-by-Step Guide to Making Cocoa Butter Cream
Making your own cocoa butter cream is easy. Here’s how:
- Ingredients Needed:
- ½ cup unrefined cocoa butter
- ¼ cup shea butter (to compare shea butter vs cocoa butter benefits)
- ¼ cup carrier oil (your choice)
- 1 tablespoon beeswax
- Optional: 10 drops essential oil
- Instructions:
- Use a double boiler to gently melt the cocoa butter, shea butter, carrier oil, and beeswax.
- Stir until everything is fully melted and combined.
- Remove from heat and let cool slightly, then add essential oils.
- Place the mixture in the fridge until partially solidified (about 1 hour).
- Whip with a hand mixer until fluffy.
- Transfer to sterilized jars.
This simple recipe allows you to appreciate the balance of shea butter vs cocoa butter in your final product. You’ll notice how each affects texture, absorption, and scent, helping you personalize your skincare even further.Imagine stepping into a world where self-care meets creativity—where you can craft your very own luxurious cocoa butter cream right in the comfort of your kitchen. For an even more nourishing experience, you can compare the effects of shea butter vs cocoa butter and choose the blend that best suits your skincare needs. This DIY delight not only elevates your skincare routine but also wraps your senses in the rich, soothing aroma of cocoa butter.
Creating this velvety cream is surprisingly simple and offers a rewarding sense of accomplishment. Whether you’re pampering yourself or looking for a heartfelt gift, homemade cocoa butter cream is a perfect choice that nurtures your skin while keeping your budget in check. Let’s explore the differences between shea butter vs cocoa butter and unlock the secrets to radiant skin through this indulgent, natural recipe.
Benefits of Using Cocoa Butter in Skincare
Cocoa butter, derived from the cocoa bean, is a powerhouse ingredient in the realm of skincare. Its use dates back centuries, celebrated for its rich, emollient properties that have proven effective in treating and soothing dry skin. One of the primary benefits of cocoa butter is its high fatty acid content, which provides deep hydration and helps lock in moisture.
When comparing shea butter vs cocoa butter, one clear difference is texture: cocoa butter is firmer and denser, while shea butter is creamier and absorbs faster. Cocoa butter’s antioxidant properties—including vitamins E and K—help repair the skin and protect it from environmental damage. This makes it ideal for reducing scars, improving elasticity, and soothing sensitive or irritated skin.
Another important point in the shea butter vs cocoa butter discussion is hypoallergenicity. Cocoa butter is unlikely to cause allergic reactions and is well-suited for all skin types. Its natural chocolate aroma enhances the sensory experience, while shea butter offers a more neutral scent and a faster-melting finish. Both are valuable in DIY beauty, but understanding shea butter vs cocoa butter will help you choose based on your skin’s needs.
Essential Ingredients for Cocoa Butter Cream
To create a luxurious cocoa butter cream, start with high-quality, unrefined cocoa butter, which retains more nutrients and provides a richer texture. For added benefits, consider combining it with shea butter—a great way to experience firsthand the difference between shea butter vs cocoa butter.
You’ll also need a carrier oil, such as coconut, jojoba, sweet almond, or olive oil. Each offers unique benefits: for instance, coconut oil has antibacterial properties, while jojoba mimics your skin’s natural oils. Beeswax is used to stabilize the cream and give it structure, though you can use vegan alternatives like candelilla or carnauba wax.
To enrich your cream even further, add a few drops of essential oils. Lavender, chamomile, and rose are soothing, while citrus oils give a fresh, uplifting aroma. When you explore shea butter vs cocoa butter, you can even split your recipe to test both versions and discover which one your skin loves most.
Step-by-Step Guide to Making Cocoa Butter Cream
Making your own cocoa butter cream is easy. Here’s how:
- Ingredients Needed:
- ½ cup unrefined cocoa butter
- ¼ cup shea butter (to compare shea butter vs cocoa butter benefits)
- ¼ cup carrier oil (your choice)
- 1 tablespoon beeswax
- Optional: 10 drops essential oil
- Instructions:
- Use a double boiler to gently melt the cocoa butter, shea butter, carrier oil, and beeswax.
- Stir until everything is fully melted and combined.
- Remove from heat and let cool slightly, then add essential oils.
- Place the mixture in the fridge until partially solidified (about 1 hour).
- Whip with a hand mixer until fluffy.
- Transfer to sterilized jars.
This simple recipe allows you to appreciate the balance of shea butter vs cocoa butter in your final product. You’ll notice how each affects texture, absorption, and scent, helping you personalize your skincare even further.
Melt the Ingredients
Start by adding the cocoa butter, your chosen carrier oil, and beeswax into a double boiler or a heatproof bowl placed over simmering water. Gently heat the mixture, stirring occasionally until all ingredients are fully melted and combined. Avoid overheating—excessive heat can degrade the natural benefits found in both shea butter vs cocoa butter, diminishing their effectiveness on the skin.
Cool and Whip the Mixture
Once melted, remove the mixture from heat and allow it to cool slightly (not solidify). This is the ideal time to add essential oils. Using a hand mixer or whisk, whip the mixture until it thickens and becomes fluffy. This step gives your cocoa butter cream a luxurious texture that mirrors store-bought quality—while staying 100% natural. Here again, understanding shea butter vs cocoa butter will guide the texture and finish you prefer.
Transfer and Store
Spoon the whipped cream into clean, sterilized glass jars. Seal them tightly and let the cream cool completely. Store your homemade body butter in a cool, dark space to preserve freshness. Comparing shea butter vs cocoa butter, cocoa butter tends to stay firm longer, while shea butter keeps the mixture softer—so adjust storage conditions accordingly.
Tips for Achieving the Perfect Texture
Crafting the perfect cream consistency is about balance. A common ratio is 1:1 between cocoa butter and carrier oil, but if you’re blending shea butter vs cocoa butter, experiment to find your preferred texture. Too much oil results in a greasy product; too much cocoa butter makes it hard.
Whip at the right temperature—warm but not hot. Too hot and it stays liquid, too cold and it won’t whip well. Using a mixer at medium-high speed adds air and gives it a light, fluffy body. Want a matte, non-greasy finish? Add a pinch of arrowroot powder while whipping.
Customizing with Essential Oils
One of the best parts of making your own cream is customizing it. Whether you’re exploring shea butter vs cocoa butter benefits or choosing essential oils, you can create something uniquely yours.
- Lavender – calming and ideal for nighttime use
- Chamomile – great for sensitive skin
- Rose – luxurious and hydrating
- Sweet Orange or Lemon – uplifting, antibacterial
- Frankincense or Sandalwood – anti-aging and grounding
Use 3–6 drops per ounce of cream. Always perform a patch test, especially if blending essential oils into shea butter vs cocoa butter creams, since their absorption varies slightly.
Storage and Shelf Life
Proper storage extends the shelf life of your homemade cream and protects its quality. Use airtight glass jars to prevent contamination. Keep the jars in a cool, dark place—heat and light can cause the ingredients to separate or spoil. If you’re in a warm climate, refrigerate it (but bring to room temp before using for easier application).
With good practices, your cocoa butter cream can last 6 to 12 months. Always use clean hands or a spatula to avoid introducing bacteria. Shea butter is slightly more temperature-sensitive than cocoa butter, so consider that when choosing between shea butter vs cocoa butter for different seasons.
Common Mistakes to Avoid
- Overheating ingredients – ruins nutrients.
- Not whipping at the right temperature – affects texture.
- Wrong ingredient ratios – can make it oily or too hard.
- Too much essential oil – may cause irritation.
- Improper storage – reduces shelf life.
A common error in the shea butter vs cocoa butter debate is ignoring their melting points—cocoa butter is harder and melts slower, so plan accordingly for blending and storing.
How to Use Your Cocoa Butter Cream
Apply to clean, slightly damp skin to lock in moisture. Warm a small amount in your hands and massage in circular motions. Ideal for rough areas like elbows, heels, or dry patches.
Cocoa butter cream also works as a night moisturizer for dry or mature skin. Its richness makes it perfect for overnight absorption. If you blended shea butter vs cocoa butter, you’ll notice a softer finish from the shea, ideal for daytime or facial use.
It can also serve as an after-sun lotion, soothing and repairing skin exposed to UV rays thanks to its emollient and antioxidant properties.
Final Thoughts: Why DIY Skincare is Worth It
Making your own cocoa butter cream is more than a beauty project—it’s a celebration of self-care, creativity, and natural living. Whether you’re comparing shea butter vs cocoa butter for the perfect mix or tailoring scents with essential oils, this process connects you deeply to what you put on your skin.
You don’t just end up with a product—you gain knowledge, control, and a sense of pride. Each batch is a chance to experiment, learn, and enjoy better, cleaner skincare tailored just for you.
So gather your ingredients, follow the steps, and embrace the nourishing power of nature. Your skin will thank you—and your soul will, too.